meta data for this page
- Deutsch
- English
Table of Contents

(remove this paragraph once the translation is finished)
Your Webpage on the Homepages-Server
Members of the OTH can add their own homepage to the Homepages-Server. It uses PHP 5 for Scripting and MySQL 5 for Databases, with storage equivalent to 50 MB.
Table of Contents
Upload Your Webpage
Put shortly...
- Provided it has't already been done, establish a Gateway with the Gateway Manager.
- With a SCP-Client connect to hps.hs-regensburg.de with Port 4444.
- Username im Format abc12345, Password like in the CIP-Pool.
- Upload website to the “html” directory, and done. The site is then reachable through a single link in this format:
https://hps.hs-regensburg.de/~abc12345/
or
https://hps.hs-regensburg.de/abc12345/
Special usernames use the Format:
https://hps.hs-regensburg.de/~specialusername/
... and in Detail
Establishing a Gateway
Provided it has't already been done, establish a Gateway with the Gateway Manager.
Download SCP-Client
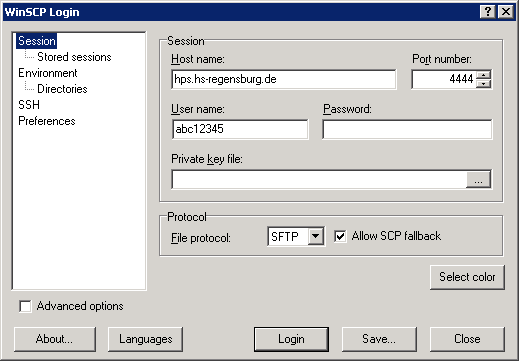
To upload your website there is a SSH-Gateway you can use. With an SCP-Client such as WinSCP you can copy your homepage to the server. Additionally download the “Installation package” and install the program on your Computer. After the start of WinSCP it should look like this:
Logging In
Enter the data as seen in the screenshot, by “User name” instead of the abc12345 format enter your contracted username, by “Password” enter your password like in the CIP-Pool.
To save time, you can save the entry bz clicking “Save…”. But beforehand please clear the password field.
In the next step WinSCP will verify that the Server is the one which it says it is. If your line by “ssh-rsa” is similar to the screenshot below, click “Yes”.

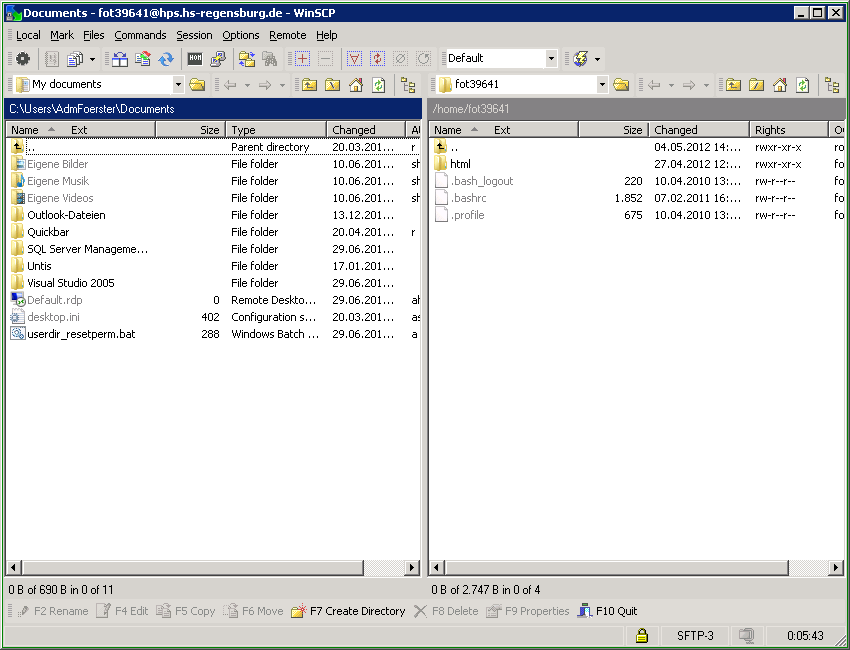
If all went well then WinSCP should show the main window:
Uploading
Now, in the left side of the window, naviate to the folder you wish to upload and, in the right side of the window, open the “html” folder:
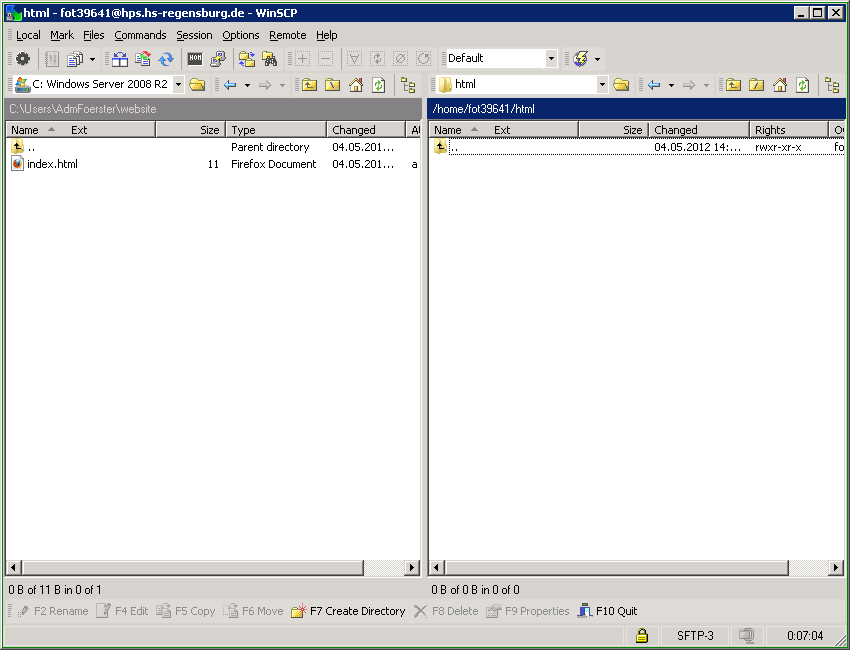 Highlight the data and folders you wish to upload, and then copy them by clicking “F5 Copy”. A dialogue window will pop up, you may then comfirm the transfer by pressing “Copy”:
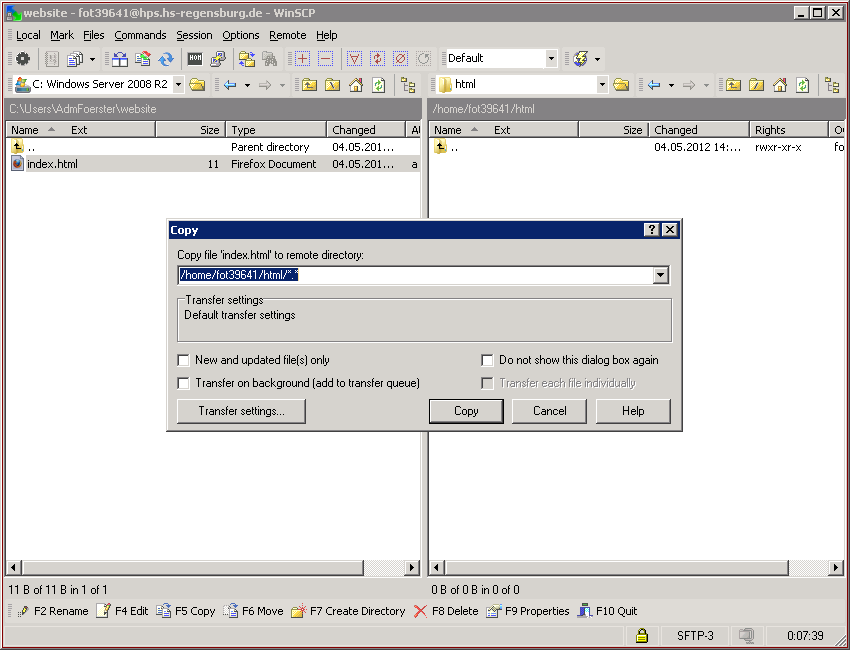
Confirming
That was it. Now, using a browser of your choice, open your webpage with the link in the Format
https://hps.hs-regensburg.de/~abc12345/
Usernames, that aren't in the format abc12345, must be called with a Tilde too
https://hps.hs-regensburg.de/~specialusername/
As long as nothing else is given in the link it will first open the data in index.html or index.php:

Simple use of the Database
To use your MySQL-Database you can use phpMyAdmin.
Log yourself in by using your DB-Username and DB-Password.
If you can't remember your database password, you can create a new one at the Gateway Manager.

Please don't upload any own or third party tools to use in your databaseas they are often used as attack points by malicious attackers. The pre-installed phpMyAdmin can be kept up from a central point.
How much memory do I have left?
Connect yourself to the server, as explain above. In the WinSCP Main Window click the button “Commands / Open Terminal”.
In the “Enter Command” enter the command:
quota -gls
After clicking the “Execute” button you will recieve your current usage and limit of your memory.
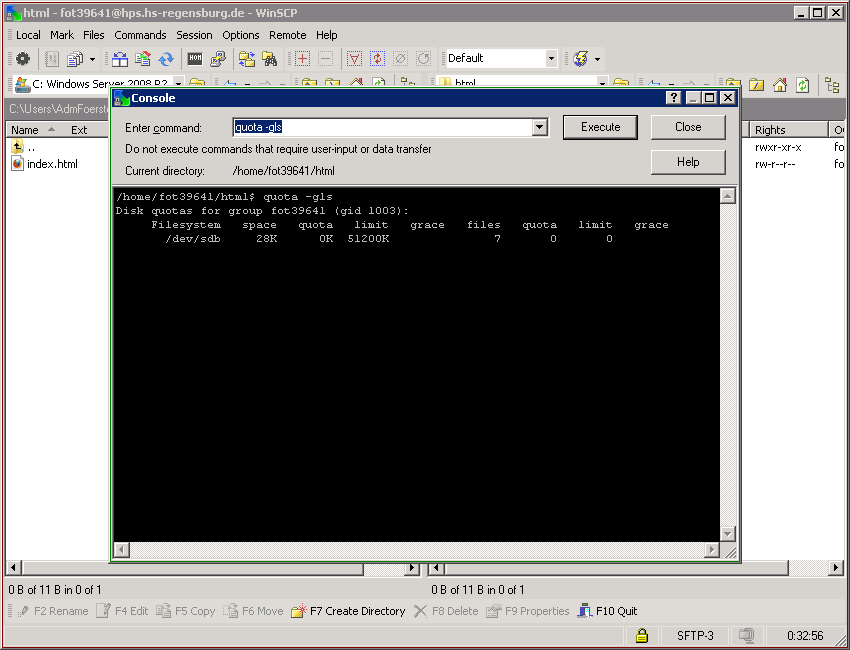
This command also works easily in a SSH-Session.
Connecting with SSH
To execute commands yourself, you can connect to a SSH-Client such as PuTTY. In the Login window enter the same information as in the SCP part of this Wiki.
Preventing access to a Webpage
If you wish to restrict, who can access your webpage, you can use the .htaccess Mechanic.
Here in the folder, in which you wish to restrict access, put a file with the name .htaccess and with the following contents:
AuthType Basic
AuthName "Gesperrter Bereich"
AuthUserFile /home/abc12345/html/gesperrt/.htpasswd
Require valid-user
This way you can replace Gesperrter Bereich with your own text. Then you must tell the webserver where the file with the access-granted users is. This directory path is dictatced by the AuthUserFile:
line.
In this example the user abc12345 in the folder html has a sub-folder with the name gesperrt. Here you must place your username like the foldername.
Finally you must make the file with the whitelist. Here in a SSH-Session you can usethe command in which
htpasswd -c -s /home/abc12345/html/gesperrt/.htpasswd benutzername
the parts mentioned above can be replaced. When editing an existing .htpasswd file the-c must be removed.
If thats too complicated, you can use a Javascript-htpasswd-Generator. There enter the usernames like passwords of the new users and click on “encrypt password”. Write the output into a file with the name .htpasswd and then place them into the same location as the .htaccess file.
If you wish to allow more than one new user, just append the output line. Such a .htpasswd file should then look like this:
test:$apr1$Izqzb/vl$SOd6F.dLpj7orU7xHa40N0
fritz:$apr1$xVvl14WY$.tHSAwnXA6ohOLMidiSSC1
A more detailed instruction set with more information such as about the back-end can be found at SelfHTML.
Error 403 in not-PHP files
If after the installation of PHP-Scripts(such as a Forum) you still get sent to the index.php page, but by style.css receive Error 403, then the Apache-Webserver is probably just missing the permissions to read the files.
Scripts will be used as both the user's and the group's to which they belong.
The following situation appeared after the installation of a SMF Forum:
$ ls -l
-rw-r--r-- 1 abc12345 abc12345  14K Dec 22 17:12 index.php
(...)
drwx------ 4 abc12345 abc12345 4.0K May 30 11:08 Themes/
So the forum was able to reach index.php but not the Stylesheet index.css underThemes/. The reason for this is the following:
index.phpis a PHP-Script and is started by the User/Groupabc12345, since this is the owner of the files. Access granted, all good.Themes/default/css/index.cssis not a PHP-Script and therefore Webserver-Userwww-dataopens. Since toThemes/onlyabc12345has permissions to open the folder, access is blocked with a 403 Error.- To fix this you should give read permission to such folders and files. You can use the following command:
find -type d -print0 | xargs -0 chmod -c 755 ; find -type f -print0 | xargs -0 chmod -c 644
With this all the read and write permissions for all files and folders will be given.
$ ls -l
-rw-r--r-- 1 abc12345 abc12345  14K Dec 22 17:12 index.php
(...)
drwxr-xr-x 4 abc12345 abc12345 4.0K May 30 11:08 Themes/
Group File Permissions for Special Accounts
If more users wish to work on one file (e.g. Special Accounts), it is useful to work with another umask.
Files use this to declare file permissions, which are assigned by default when creating a file or folder.
Normally this is set to the value 0022 , which leads to the following rights:
$ touch test
$ ls -l test
-rw-r--r-- 1 abc12345 spezialaccount 0 Dec 10 15:25 test
Here only the user abc12345 has writing permission (-rw-r–r–), but not the group spezialaccount (-rw-r–r–) Writing permissions are not enough for working together.
This can be remedied with hindsight chmod:
$ chmod -Rc g+w test
mode of ‘test’ changed from 0644 (rw-r--r--) to 0664 (rw-rw-r--)
$ ls -l test
-rw-rw-r-- 1 abc12345 spezialaccount 0 Dec 10 15:25 test
So that you don't have to repeat this every time it is reccomended to set a differentunmask with:
$ umask 0002
If the user by default gets (-rw-rw-r–) and the group (-rw-rw-r–) writing permission then:
$ touch test2
$ ls -l test2
-rw-rw-r-- 1 abc12345 spezialaccount 0 Dec 10 15:30 test2
Im WinSCP setzt man dies im Transfer Settings Dialog im Bereich Upload Options → Set Permissions.

