This page is not fully translated, yet. Please help completing the translation.
(remove this paragraph once the translation is finished)
Windows 10 integrated E-Mail App
Windows 10 has an integrated Mail-Client. The establishment is described in the following paragraphs.
Account setup
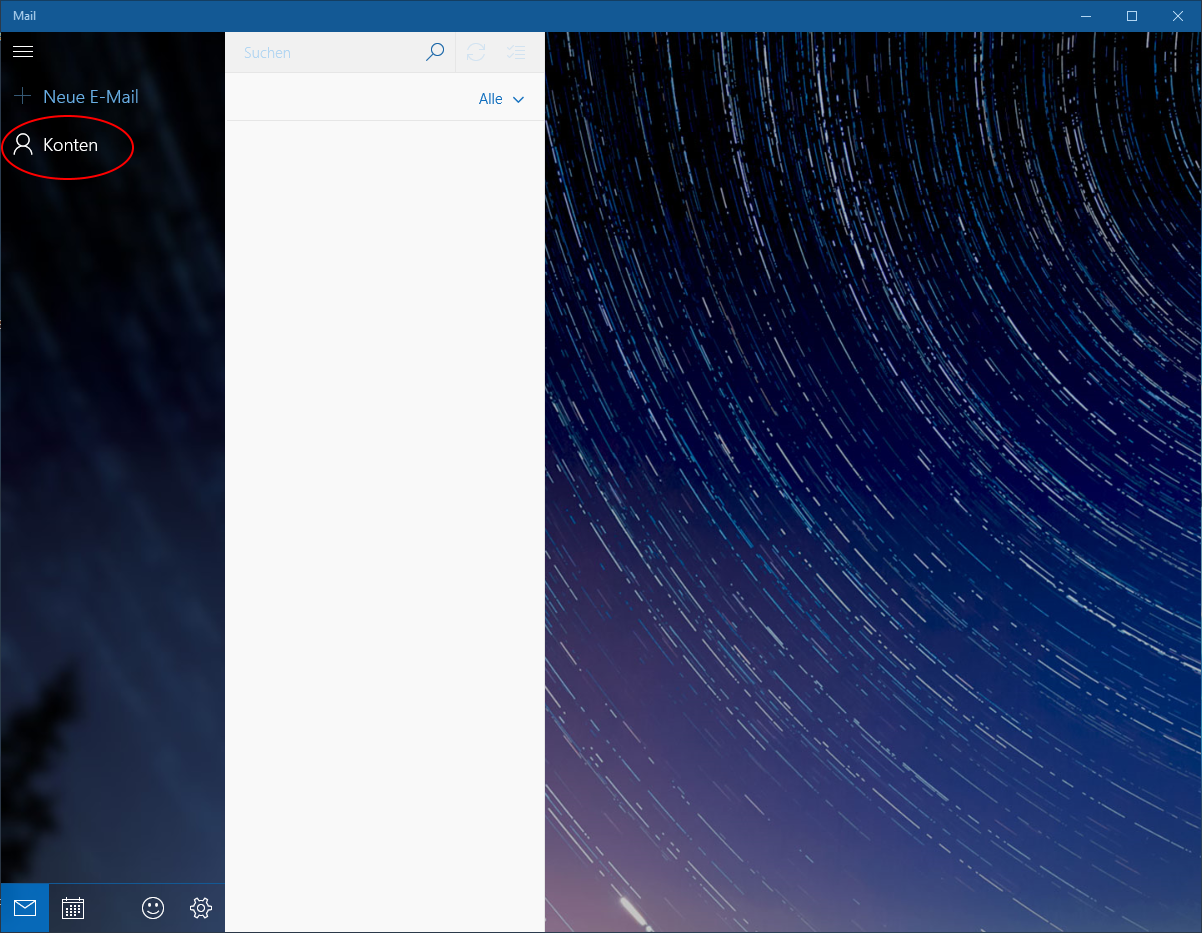
- Open the Windows 10-Email App
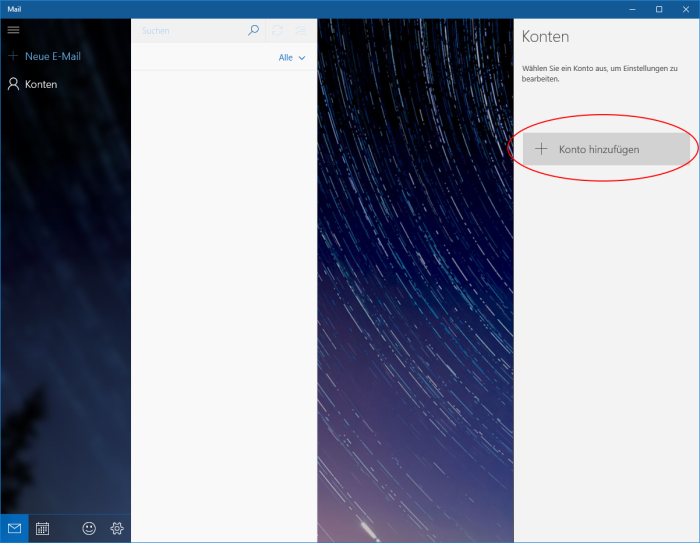
- Click on “Accounts”

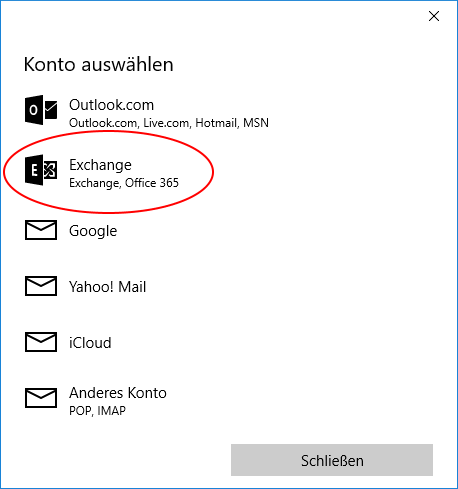
- Click on “Add account”
- Choose “Exchange”

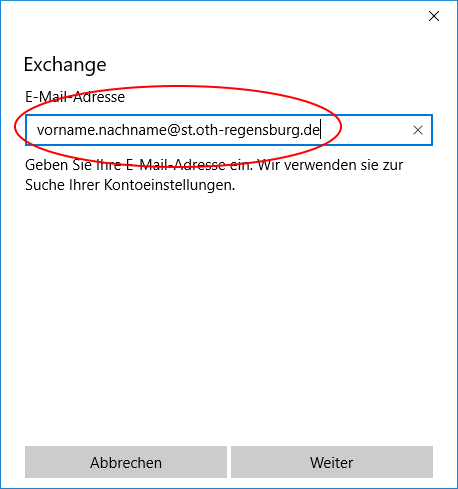
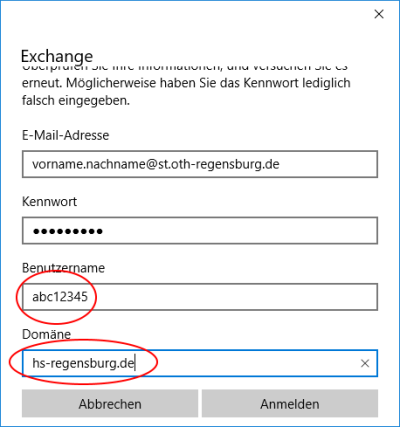
- Put in your E-Mail in a format like “firstname.lastname@st.oth-regensburg.de”

- Put in your password

- Put in your user name in a format like “abc12345” and the domain “hs-regensburg.de”
- After clicking “Sign in” you may be asked to accept the security guidelines of the Exchange-Server.
Now the account setup should be done.